

how long to pressure cook green beans
Helena Ricketts is a freelance writer currently living in Indiana who loves writing about cooking.
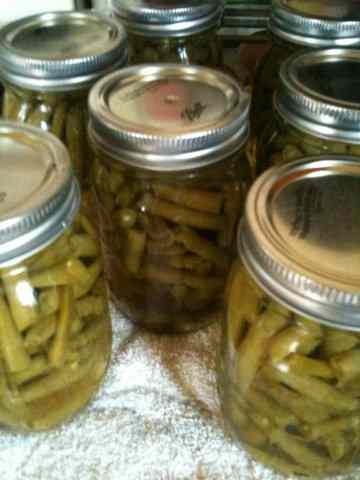
Sitting on the counter top on a towel to cool. The jars will be washed, dried, labeled then put away in our pantry.
Helena Ricketts
Safely Home Canning Green Beans
Safely canning green beans begins with making sure you have the proper tools to do it. In addition to canning jars, you will need a pressure canner like this one, which is what I use. Using a pressure canner ensures that the temperature inside the jars becomes high enough to kill all forms of mold and bacteria. Botulism is the main organism that people are concerned about because it requires the highest temperature to kill.
Pressure Canner vs. Water Bath Canner
The interior of a pressure canner can reach 240°F compared to a water bath canner, which will only reach a maximum temperature of 212°F, the boiling point of water at sea level. Anything that does not have a high acid content, such as green beans, needs to be processed with a pressure canner.
The standards for what is safe in canning change frequently. My grandmother always canned her green beans in quart jars in a water bath canner. This is no longer recommended as the safe way to can low acid foods because of the threat of foodborne illness, such as botulism. Investing in a pressure canner is a one-time expense that will pay for itself in food savings and safety.
Where to Find Fresh Green Beans
You can plant the beans in the early spring and expect the harvest to start approximately 2 months later. Green bean plants will produce all the way into fall. You want to pick the beans when they are tender, about 4 inches in length. You also have the option of allowing the pods to become larger and shelling the beans to can them instead. The plants will provide multiple canning sessions per season.
If You Don't Have a Garden
Fresh green beans can also be found in some grocery stores and at farmer's markets. If you don't have room for a garden, you can still enjoy the flavor of home-canned green beans by purchasing them when they are in season and on sale for the best price. Some vendors at the farmer's market would be more inclined to give you a much better deal at the end of the selling time.
No matter the source of your green beans, make sure they are as freshly picked as possible before canning them. The results will be a much nicer-tasting bean that holds more nutritional value.
Cook Time
| Prep time | Cook time | Ready in | Yields |
|---|---|---|---|
| 30 min | 25 min | 55 min | 1 quart or 2 pints per pound |
Ingredients
- fresh green beans
- canning salt (optional)
Equipment:
- quart or pint jars with lids and rings
- canning funnel
- jar lifter
- towels
- canning tool for eliminating bubbles in jars
- pressure canner
Instructions for Cold-Packed Green Beans
- Rinse the green beans in cold water to make sure there is no dirt, bugs, or anything else undesirable in them or on them.
- Examine all of your jars to make sure there are no chips or cracks in them. Wash them in hot soapy water to remove any dust if they have been in storage or manufacturing debris if they are new.
- Following the instructions that came with your pressure canner, place the canning rack in the bottom of the canner and add the water. Place your jars down in the water so they warm up. You will be pouring boiling water over the beans and if the jars are cold, they could break.
- If you are using string beans, you'll want to break the ends off and remove the strings. Break the beans into 2- to 3-inch-long pieces. Some people actually use a knife to cut theirs into pieces. You can do that if you would like but I have found if the beans are fresh, they will snap easily when you break them.
- Loosely pack the jars with the raw green beans leaving about 1 inch of head space (space from the top of the jar to the top of your beans).
- Once all of your jars are filled, you can add salt if you want although it is not necessary because beans have 61 mg of sodium per pint naturally. If you do add salt, make sure you are using canning salt, NOT table salt. Table salt will discolor the beans and make them look less appetizing. You'll add 1/2 teaspoon to pints or 1 teaspoon to quarts.
- Fill the jars with boiling water, leaving the 1 inch of head space inside the jar.
- Using your canning tool OR a rubber spatula, go around the inside of each jar to release any air bubbles that may have formed. If you have a jar that had large bubbles, you may have to add more boiling water.
- Place your lids into a bowl or pan of hot water to warm up the wax ring on the inside of the rim.
- Using a clean cloth or towel that has been dampened in hot water, wipe the rim of each jar to remove anything that may be there like salt, water or any bits of bean. This is important because if you don't wipe the rim and something is there, it could cause the seal to fail.
- Center the lid on the jar and screw the ring in place. Tighten only finger tight.
- Place the jars into the pressure canner. Processing time and weight depends on your particular canner, the altitude you live in and whether or not you are using quart or pint jars. My canner is made by Presto and I live in Indiana, so I process at 11 pounds of pressure for 20 minutes for pint jars and 25 minutes for quarts.
- Once you have processed your beans, allow the canner to completely cool before opening the top and remember, open the top pointing away from you so you do not get burned.
- Lift the jars out of the canner and set them on a towel in a safe place away from any drafts for 24 hours. You will hear the lids pop as the top of the jars seal.
- Check them after 24 hours. If any jars have not sealed, you will want to put them in the refrigerator and use those first. The sealed jars will just need the rings removed, washed, dried, labeled and put away out of direct sunlight.
Photo Tutorial
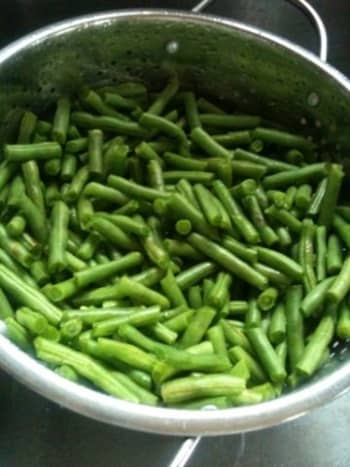
Snapped green beans waiting to be canned.
Important Things to Remember When Using a Pressure Canner
Although pressure canning is safe, there are a few things that you will want to remember when using one in your kitchen. These are some of the most common mistakes that people make when canning.
- Never leave the kitchen while the canner is pressurized. It can take mere seconds for a canner to go from 11 pounds of pressure to more than 15 pounds. You will need to make immediate adjustments with the heat source when this pressure starts to fluctuate.
- If the canner falls below the required pressure, you have to start the time all over again when it reaches pressure again.
- Do not allow the jars to touch inside the canner. This can cause breakage.
- Vinegar can be added to the water to help with hard water residue on the jars. I personally do not use it because I do not like the way it smells and don't mind the residue because the jars need to be washed when they are finished either way.
- Always check your gasket and vent tube. After a while, the gasket can become dry and start to crack, which means the canner will not hold pressure as well. Vent tubes can easily become clogged, and this can create a dangerous buildup of pressure inside the canner.
- Pressure canners are not recommended for glass-top stoves because of their weight. They have been known to cause cracks and scratches in the glass.
- Things that can not be canned in a pressure canner include eggs, pasta, and dairy-based soups.
- Spices and seasoning flavors are amplified when pressure canned. Sometimes it is better to save the seasonings for when the item being canned is eaten.
Pressure canning is a liberating activity because it can save you money, and it will provide the freshest food for you family without all of the chemical additives and preservatives that are found in canned grocery store foods today. I hope you explore all of the options available to you when it comes to pressure canning your own food. We have certainly enjoyed it!
garyriddell42@gmail.com on July 12, 2020:
Pressure cook Green beans the seals buckled up ,any comments
Sallu on July 05, 2020:
How much water goes in the pressure canner when canning quart? I have been told an inch over the jars and only a couple inches total in the canner over the bottom of the jars.
Paul on August 05, 2018:
I don't have a pressure gage on my pressure, when i shut it down after 25 minutes how long do i wait to open it?
Helena Ricketts (author) from Indiana on September 06, 2017:
I'm sorry, I have no idea. I didn't even know that two quart canning jars were out there. You might try contacting the pressure canner manufacturer and ask them or the jar maker. Those would be the two that I can think of that might know the answer.
Layla on September 06, 2017:
How long do you process a two quart size jar of green beans? Thanks in advance!
Helena Ricketts (author) from Indiana on June 03, 2013:
Thank you! You are right, it is a great feeling when you know you have great tasting, healthy food in the pantry. I feel like it's an accomplishment every time I do a canning session. You can do so many different things with a pressure canner!
Zsuzsy Bee from Ontario/Canada on June 03, 2013:
Great hub along with great pictures. I have been canning for quite a few decades now and still find it absolutely thrilling when I place the ready jars onto the pantry shelf. (my pressure cooker doesn't look pretty anymore but it was one of the most worthwhile investments I have ever made. I've had to replaced the gaskets twice already I would say once every ten years or so.)
Thank you for sharing, lots will learn a great deal from your well put together hub. Voted up and useful.
regards Zsuzsy
how long to pressure cook green beans
Source: https://delishably.com/vegetable-dishes/How-to-Can-Green-Beans-Anytime-of-Year
Posted by: ansellhoch1985.blogspot.com
0 Response to "how long to pressure cook green beans"
Post a Comment